Search The Knowledge Base
Generating And Printing Barcodes
To generate barcodes, go to the Barcodes & Print page, then follow the steps on the wizard.
Note – you may find it easier to use the printer’s own software for generating and printing barcodes as opposed to following the steps below.
Initial Steps
- Install Java 7 or higher.
- Download and install the QZ Tray application on your computer (compatible with Windows, Mac OS X, Linux).
Once installed, from then henceforth, ensure that the QZ Tray is running before proceeding with the wizard steps mentioned below.
Depending on the version of the QZ Tray application (available as either Free or Premium) that you’re using, you will need to constantly grant the application permissions to perform certain actions, whenever prompted.

The prompts on the free QZ Tray version may appear repetitive, but that’s how that application works. On the free version, the “Remember this decision” option does not work with the “Allow” decision.
Printers
The QZ Tray application supports printing on thermal and inkjet/deskjet printers.
The type of printing formats falls under two categories:
- raw printing
- pixel printing
Raw Printing
Many thermal printers (such as Zebra or Epson manufactured printers) need special raw printer commands sent to them in order to perform certain functions such as barcode printing.
For most printers, look for a technical specification or guide that refers to ZPL, EPL, ESCP, FGL, CPCL, EPCL. Note, ZPLII, EPL2, ESC/POS are, for the most part, synonymous with their abbreviated counterparts. If your printer specification lists ESC/POS Emulation or ZPL Emulation, then Raw Printing will also work.
Pixel Printing
Pixel Printing format is more common for LaserJet or Deskjet printers.
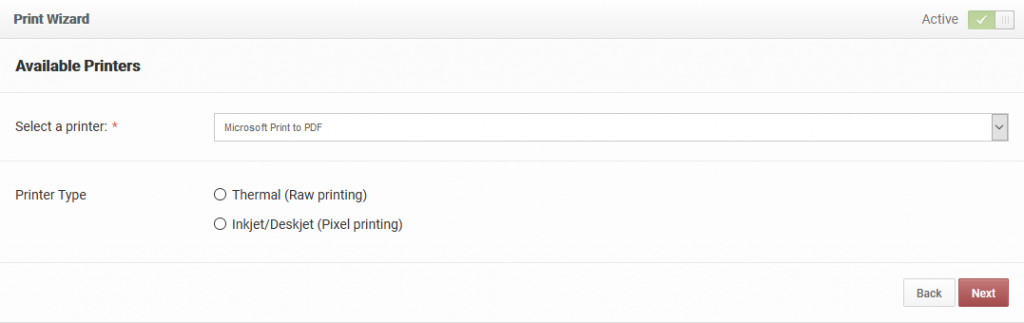
On the wizard, under the Available Printers step, choose the printer that QZ Tray has detected. Alternatively, if using a network printer, enter its IP address and port number.
After that, choose the type of printer it is or the type of printing format being used.
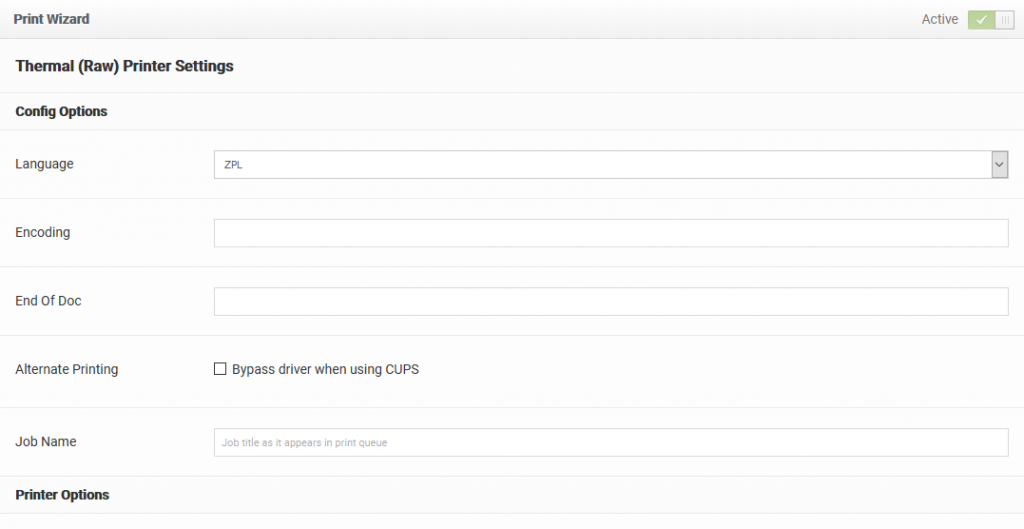
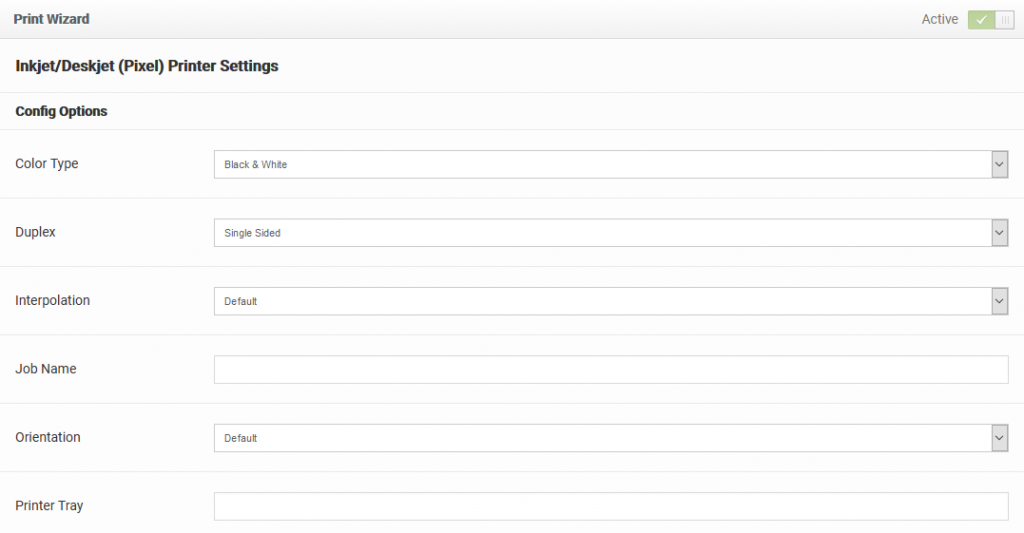
Printer Settings
Under the Printer Settings step, depending on the type of printer chosen, you will see a list of options that can be customized to fine-tune the printing.
Raw Printing example
Pixel Printing example
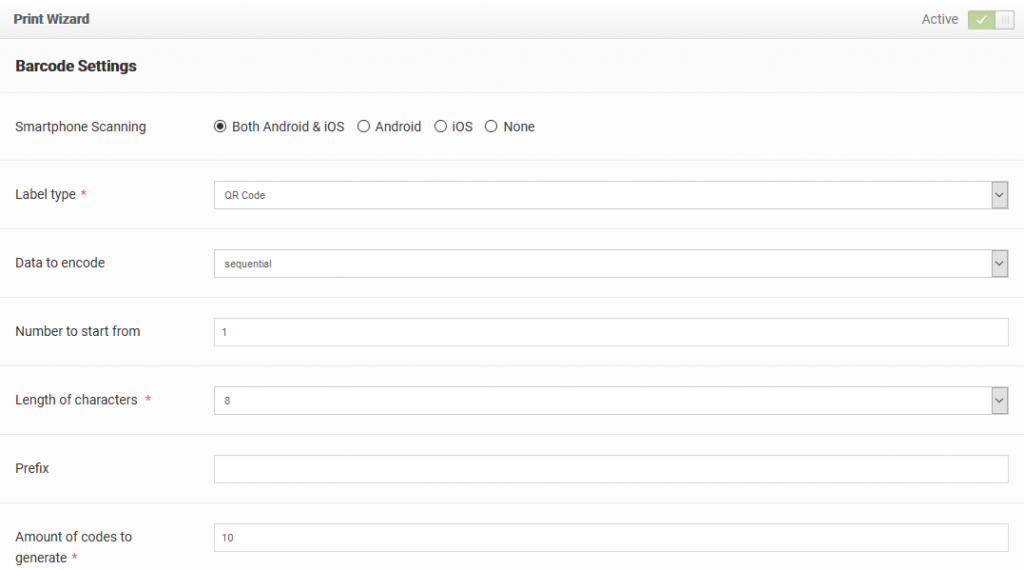
Barcode Settings
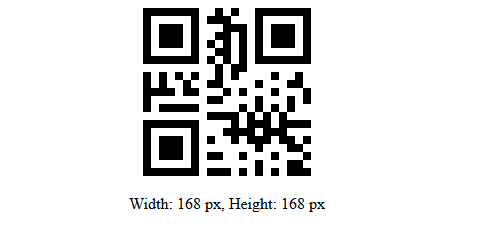
Under the Barcode Settings step, you can generate barcodes in many 1D or 2D formats, including QR codes, Datamatrix, etc.
Once these barcodes are generated, you would either need to scan them to associate them with an asset or inventory.
Alternatively, if you know what data is on the barcode, you could import them from a CSV file, where the asset or inventory record association has already been made.
Smartphone compatibility
First, indicate whether the barcode generated should be compatible with our iOS or Android smartphone app.
Data to encode
Arbitrary data
You can choose to generate barcodes that have arbitrary sequential or unique random data. This works fine for 2D barcodes such as QR codes, but for 1D barcodes, you need to ensure that the encoded data matches the barcode’s data specification. For example, the length of characters to encode, type of data to encode will be different with each 1D barcode.
Pre-defined data
If you have your own barcode data, you can enter them on the text field on the form. Each barcode data should be on a single line.
Existing data
If you already have asset or inventory records in your account, you can have the app encode its barcode values.
From the assets or inventories table, you can also choose and select the records you want their barcode values printed.
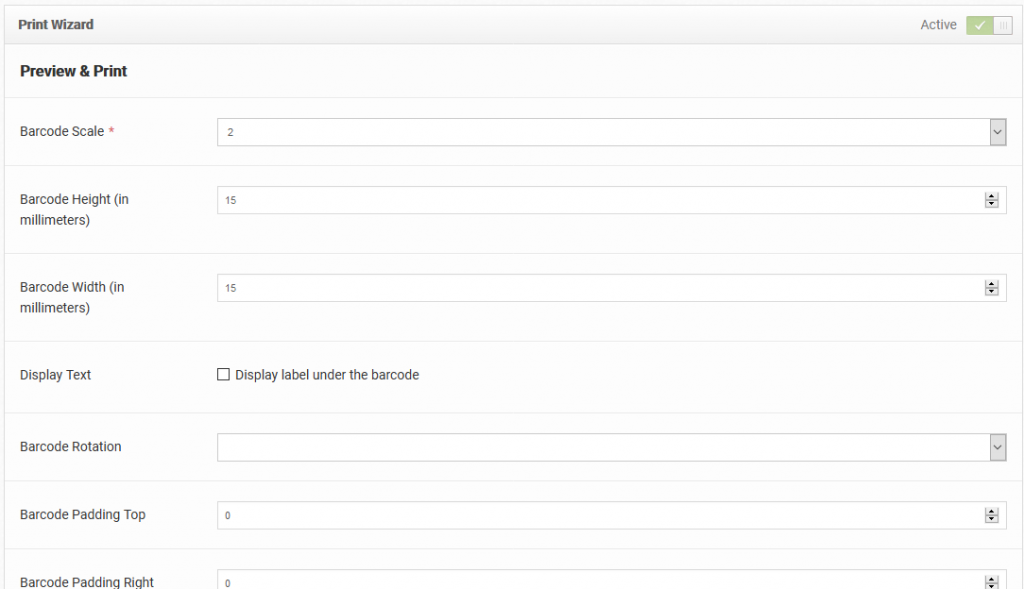
Preview & Print
Under the Preview & Print step, you can adjust the barcode settings such as width, height, padding, size, number of barcodes per row, etc.
Actions
Under the Actions section, you can choose to preview, test print, or print all the barcodes.

Preview
Before printing the barcodes, we recommend first reviewing it so that any necessary adjustments should be made.
The preview will only show a single barcode.
Test Print
Before printing the entire barcodes, you may want to first do a test print to see if all is okay.
Print All
This action will print all the barcode data. You will not be able to see, on the page, what is being printed.