Search The Knowledge Base
Google Sheets Add-on
Simplify the way you work with spreadsheet data for your assets and inventory using the Ventipix Asset & Inventory Manager’s Google Sheets sidebar add-in.
A sidebar in Google Sheets, as shown in the example below, is a custom panel that opens on the right-hand side of your spreadsheet. This sidebar is designed to interact directly with your spreadsheet data.
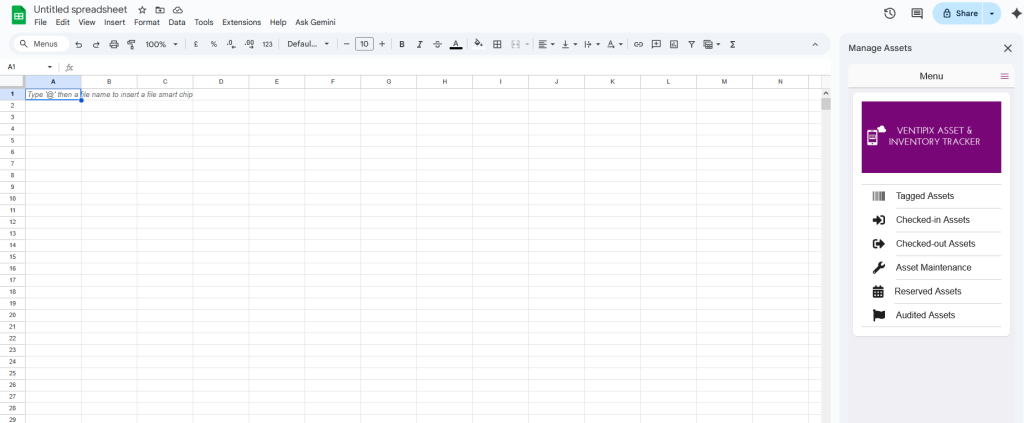
With our sidebar, you can interact with the data in your account —for example, to import it, make and sync changes, search and view history, create to-do tasks, run reports, and analyze it with AI. You can also scan NFC tags or barcodes, including QR Codes, directly to the spreadsheet.
To install the add-on, visit the Google Workspace Marketplace page. Alternatively, from the Extensions menu in Google Sheets, go to Add-ons > Get Add-ons, then search for Ventipix Asset & Inventory Manager.
Once installed, the Ventipix Asset & Inventory Manager add-on will be available from the Extensions menu in Google Sheets.
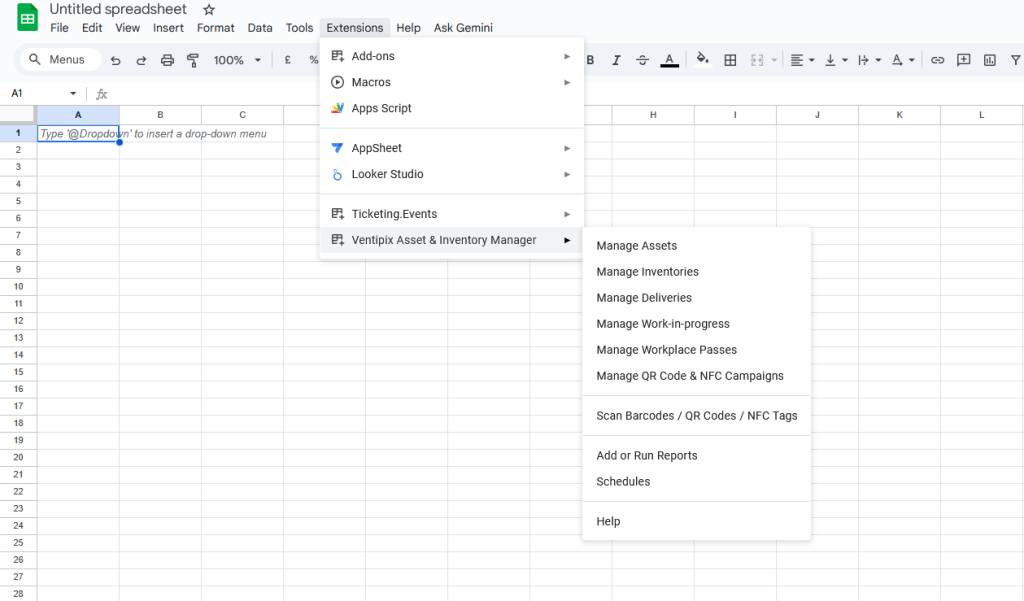
Simply click on it, then choose a desired function.
Below are the functions that our add-on supports.
Importing Data
You can import data directly from your account into Google Sheets.
From our add-in’s navigation menu, choose a service you want to manage.
When the add-in opens, choose the worksheet you want to use, then under the Select an Action option, choose Import Records.
After that, click on the Import Records button.
If you want your data to automatically be imported at regular intervals, enable the Auto-import feature. Note: for this feature to work, the sidebar must remain open.
To change the import frequency, click the icon at the top right of the sidebar, then select the Settings option.
Creating Data
You can use the data present in a worksheet to directly create data in your account.
From our add-in’s navigation menu, choose a service you want to manage.
When the add-in opens, choose the worksheet you want to use, then under the Select an Action option, choose Create Records.
After that, click on the Import Template button to obtain data on how to align the columns in the spreadsheet in a manner that the app expects. The cells with a red background denote that the data in them are mandatory. For most of these fields, what’s displayed will be based on your Data Capture settings, so if you want to rearrange them or change them, you need to do so from your Data Capture page.
Once you have populated the spreadsheet, click on the Create Records button.
Updating Data
You can update data directly from the spreadsheet and have it sync with that in your account.
From our add-in’s navigation menu, choose a service you want to manage.
When the add-in opens, choose the worksheet you want to use, then under the Select an Action option, choose Update Records.
The data to be updated must have first been imported. Refer to the Importing Data topic above.
After you have made changes to your data or wish to assign some records to a Group, select the rows with data that you want to sync with your account.
After that, click on the Update Records button.
Deleting Data
For data that you have previously imported, you can delete it in the spreadsheet and have the same deleted in your account.
From our add-in’s navigation menu, choose a service you want to manage.
When the add-in opens, choose the worksheet you want to use, then under the Select an Action option, choose Delete Data.
In the spreadsheet, select a column with the records you want to delete. This selected column must be the one that identifies the record, e.g, a column with barcode or NFC IDs.
After that, click on the Delete Records button.
Searching Data
You can search for records that exist in your account
From our add-in’s navigation menu, choose a service you want to manage.
When the add-in opens, choose the worksheet you want to use, then under the Select an Action option, choose Search.
In the spreadsheet, select a cell with the data you want to search for. The column the cell belongs to must be one that also exists in your account.
After that, click on the Search button.
If the search results are available, they will be displayed on the sidebar.
Viewing History
You can view the history of records that exist in your account
From our add-in’s navigation menu, choose a service you want to manage.
When the add-in opens, select the worksheet you want to use. Then, under the Select an Action option, choose View History.
In the spreadsheet, select a cell with the data that identifies the record, e.g, the barcode or NFC IDs.
After that, click on the View History button.
If the record exists, the history will be displayed on the sidebar.
Analyzing Data with AI
You can use our ChatGPT, Grok AI, or Google Gemini AI integrations to analyze the data present in your spreadsheet. This data does not necessarily need to be associated with your account.
From our add-in’s navigation menu, choose a service you want to manage.
When the add-in opens, choose the worksheet you want to use, then under the Select an Action option, choose Analyze with AI.
After that, enter the question to ask the AI platform regarding the data in the selected worksheet, choose an AI platform for the analysis, and then click on the Ask AI button.
The data in your worksheet will then be analyzed, and if the AI platform returns an analysis or reports, choose another worksheet to save the analysis in.
Adding To-do Tasks
You can add to-do tasks using data from your spreadsheet and then manage them with our Google Chrome or Microsoft Edge browser extensions, or from the web and smartphone apps.
From our add-in’s navigation menu, choose a service you want to manage.
When the add-in opens, choose the worksheet you want to use, then under the Select an Action option, choose Add To-do Tasks.
In the selected worksheet, select cells from the column with values that identify the records, e.g, barcode or NFC IDs.
After that, click on the Add a Task button.
The sidebar will then open a new page with a form to fill out relevant to the tasks to be done.
Scanning Barcodes, QR Codes, and NFC Tags
Install our Google Sheets Add-on. Then, use it to scan QR codes, NFC tags, and other 1D barcodes.
For the QR codes and other 1D/2D barcodes, you can scan them using your device’s webcam, Bluetooth, or USB scanners (running in HID Keyboard Wedge mode), or our iOS and Android smartphone apps.
For the NFC tags, you will need to use our smartphone apps.
How to scan
From the add-on’s menu, select the Scan Barcodes / QR Codes / NFC Tags option.
After that, choose how you want to scan.
If you’re using the device’s webcam, check what camera has been selected, then click on the Start Scanning button. Follow the prompts to allow the sidebar to use your camera, then proceed to scan 1D barcodes and other 2D barcodes such as QR Codes, etc.
If you’re using a Bluetooth/USB scanner, ensure that it’s set up to send data to the device as if it were entered from a keyboard. After that, position your cursor under the Bluetooth/USB Scanning field, then proceed to scan barcodes/QR codes.
If you’re using our smartphone app, you first need to configure it to discover your spreadsheet and communicate with it. After filling out the form, you will be presented with a configuration QR code to scan or a URL to visit.
To scan this configuration QR code, log in to the smartphone app, then under the Services page, scroll to the Spreadsheet Add-on section.
Tap on the Send Scans to Excel or Google Sheets option.
After that, under the Scan Section, tap on the QR Code button, then scan the QR code displayed in the sidebar
With the URL option, simply share it with users who already have our smartphone app installed.
Once the configuration is complete, proceed to scan barcodes, QR codes, or NFC tags.
For the sidebar to receive scans from the smartphone, ensure that it remains open.
Scanning Options & Actions
Under the Scanning Options in the sidebar, choose the worksheet to use.
Under Scanning Actions, select an option with the desired behavior.
Insert Scanned Data – If you want the scanned data to be inserted into a specific column in the spreadsheet. Select the column in the spreadsheet where the scanned data should go, or specify the column to be used by entering the column letter in the sidebar. Optionally, choose a color for the cell background.
Insert & Replace – If you want the scanned data to be inserted into a specific column in the spreadsheet, along with other information (such as date, time, status, etc) into other columns. Learn more.
Find & Mark Found Data – If you want the spreadsheet to search for the scanned data, and the matching row to be highlighted with a background color. Select the column in the spreadsheet where the scanned data should be found, or specify the column to be used by entering the column letter in the sidebar.
Find, Mark & Replace – If you want the spreadsheet to search for the scanned data and the matching row highlighted with a background color. In addition to the search, other columns that you specify can get altered with data that you specify, such as date, time, status, etc. Learn more.
Find, Mark & Return Found Data – This option is only available when using our smartphone app for scanning. The spreadsheet will be searched for the scanned data, and the matching row will be highlighted with a background color. Specific columns that you specify from the matched rows will then be displayed on the smartphone. Learn more.
Post-scan Actions
After the scanning session is complete, you can retrieve the records that were involved in the scans and have them saved in a different worksheet.
To do so, under the Post-scan Actions, click on the Copy Scanned Rows button. On the page that follows, choose what should happen with the scanned data.
Add or Run Reports
You can import calculation reports or reports to be used with Power BI and Looker Studio from the sidebar.
From our add-in’s navigation menu, choose the Add or Run Reports option.
Adding a Report
Under the Add a Report section, enter a title to identify the report, then paste the URL that was generated for the report.
Click on the Add Report button to save it.
Running a Report
To run a report, go to the Run a Report section.
Choose a saved report, then a worksheet to download it into.
After that, click on the Run Reports button.
You can also set the sidebar to auto-import the reports at regular intervals. Note: this function requires the sidebar to remain open.
To change the import frequency, click the icon at the top right of the sidebar, then select the Settings option.
Analyzing Reports with AI
Once your report has been downloaded to a worksheet, click on the Analyze with AI button to get the data in the report analyzed by AI platforms.
You can use our ChatGPT, Grok AI, or Google Gemini AI integrations for the analysis. Ask the AI platform what to analyse, then if it returns the analysis, choose another worksheet where it will get saved.
Schedules
When working with date-related data, e.g., for asset reservations, maintenance schedules, etc, you can configure the sidebar to generate calendar schedules that can be viewed from Google Calendar.
From our add-in’s navigation menu, choose the Schedules option.
On the Schedules page, enter the name of your calendar, then choose the columns that have the dates that you want to use.
You can also configure the schedule to repeat at regular intervals and specify when to receive upcoming schedule reminders.