Search The Knowledge Base
Asset Maintenance
The platform can enable you to track maintenance details of assets.
Prerequisite
Before adding assets to Maintenance, they first need to exist under the Tagged Assets section.
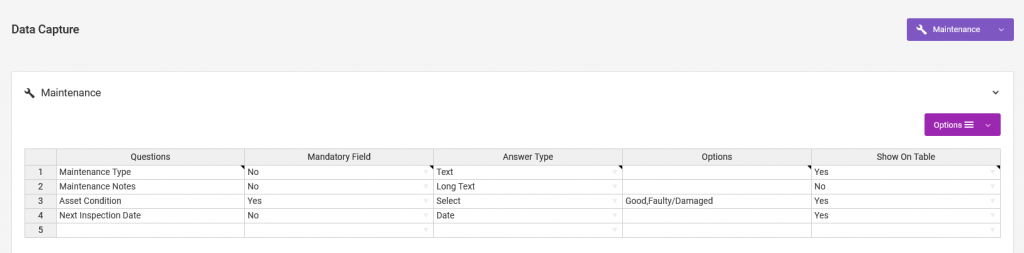
You then need to customize the Asset Maintenance Data Capture fields so that you can gather the details you need about the assets being added to Maintenance.
There are several ways to add assets to Maintenance.
Asset maintenance from the web app
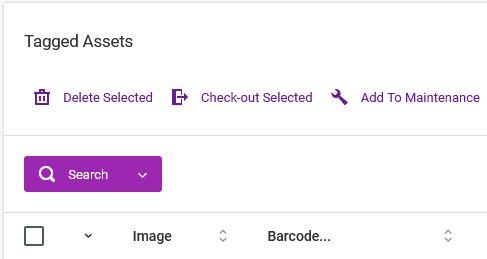
Option 1 – From the Tagged Assets page
Go to Manage Assets > Tagged Assets. On the table, select the assets then click on the Add To Maintenance button, fill out and submit the form.
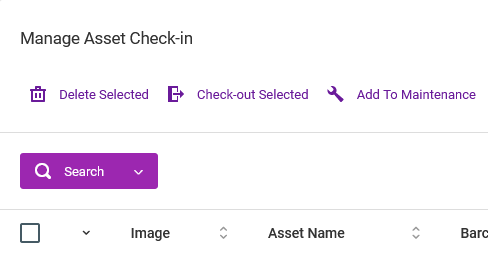
Option 2 – From the Asset Check-in page
Assets that have been checked in, and are faulty, can be added to Maintenance from the Manage Assets > Check-in page.
On the table, select the asset then click on the Add To Maintenance button, fill out and submit the form.
Option 3 – From the Asset Maintenance page
Go to Manage Assets > Maintenance page. Click on the Add New Records button > Add A Single Record. On the new page, select the asset then fill out and submit the form.
Option 4 – Use an online spreadsheet
Go to the Manage Assets > Maintenance page, then click on the Add New Records button > Scan To Spreadsheet. On the new page, use our smartphone app to scan barcodes or NFC tags, then populate the rest of the spreadsheet.
Option 5 – Use Bluetooth, USB or Wireless scanners
Go to the Bluetooth & USB scanners page, then choose Add To Maintenance from the dropdown menu.
When barcodes are then scanned, the spreadsheet at the bottom of the page will be populated with the scanned values. You then need to fill in the rest of the cells with the corresponding data, then save the spreadsheet.
Option 6 – Importing CSV files
You can also import data by going to the Add New Records > Import From CSV option.
When importing CSV files, ensure that your data is aligned properly as shown on the example templates.
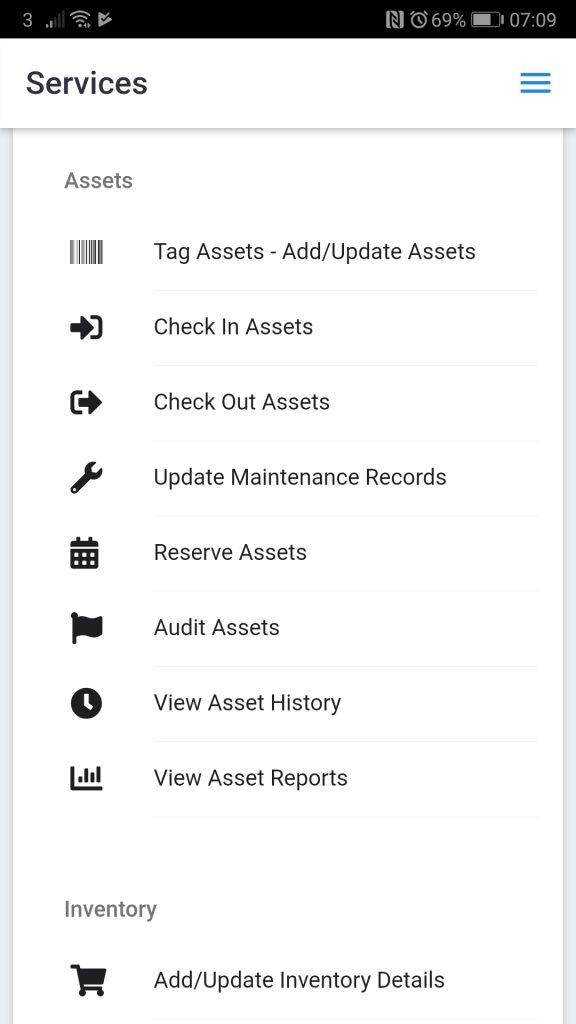
Asset maintenance from the smartphone app
On the iOS or Android app, go to Update Maintenance Records, then fill out the form.
If you have barcodes or NFC tags, you can scan them using the app. Alternatively, you can search for the asset.
Asset maintenance via automated workflows
Using Zapier
Using Zapier, you can automate how asset maintenance records are added to your account. For example, you could edit a Google Sheet row, and have the data on that row automatically used to create an asset maintenance record.
You first need to set up a Zap trigger.
After that, choose the app Ventipix Asset & Inventory Manager, and the action Create Asset Maintenance.
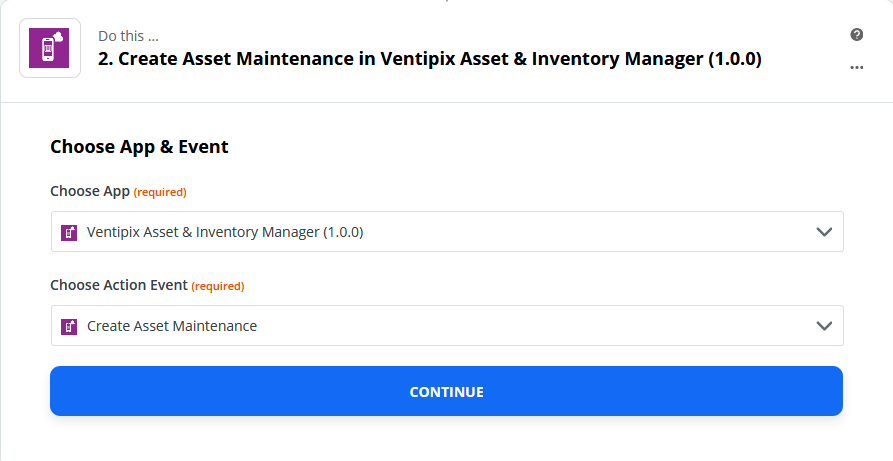
Click on Continue, then authenticate your account.
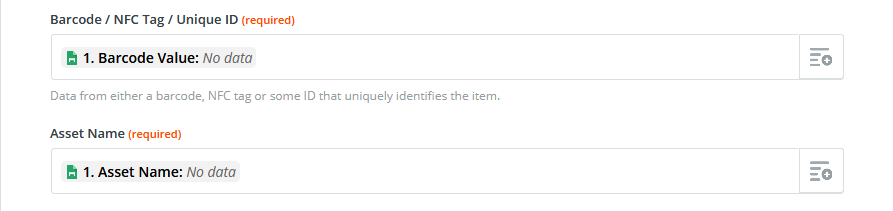
In the step that follows, map data from your Zap trigger on to the fields that you want to populate automatically.
Proceed to then test the integration, and turn the Zap on.
Using Microsoft Power Automate
Using Microsoft Power Automate, you can also automate how assets are added to your account from other platforms (flows). For example, you could set up a trigger or schedule whereby data from the source platform is automatically used to create an asset in your account.
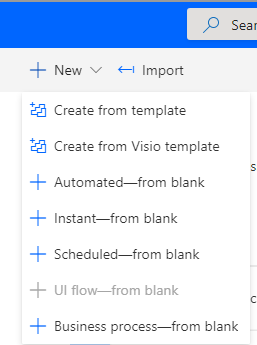
In your Power Automate account, set up a new flow, for example, “Automated – from blank” or “Scheduled – from blank“.
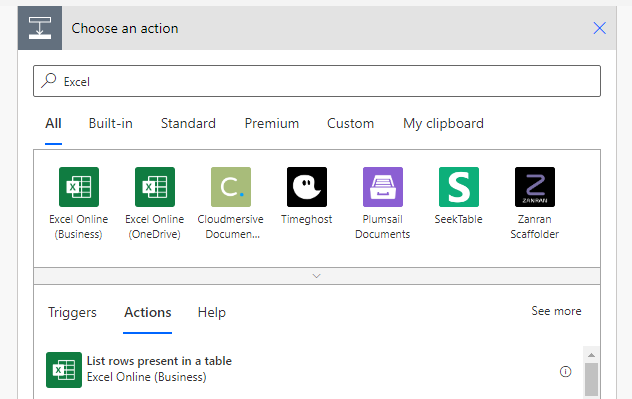
After that, choose the connector with the data source, and its appropriate action. If using Excel, you would choose, “list rows present in a table“. For example:
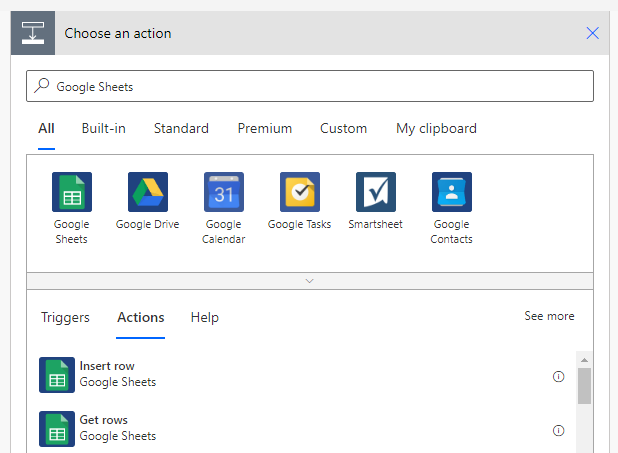
If using Google Sheets, you would choose, “Get rows“. For example:
Once the connector has been set up with all its authentication requirements, and file location details, proceed to add a new step.
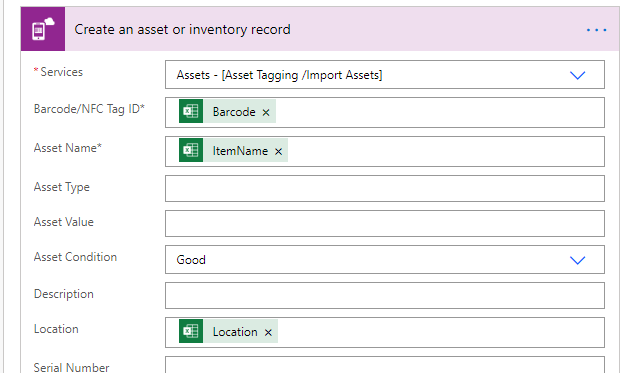
In this new step, search for “Ventipix Asset and Inventory” connector. Then, under its Action menu, select, “Create an asset or inventory record“.
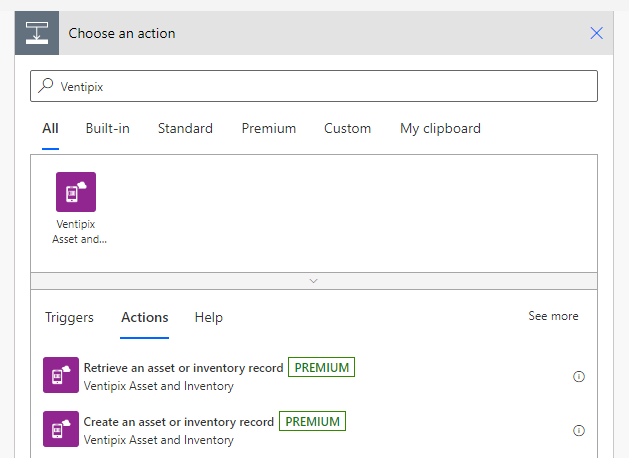
In the new prompt, under the Services dropdown, select “Asset Maintenance”.

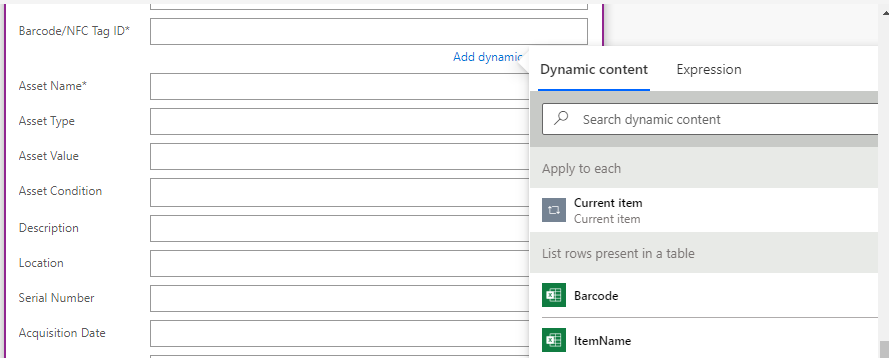
In the input fields that will then be displayed, select the dynamic content that should go on to them.
On the “Apply to each” prompt, click on the “Create an asset or inventory record” title to expand it.
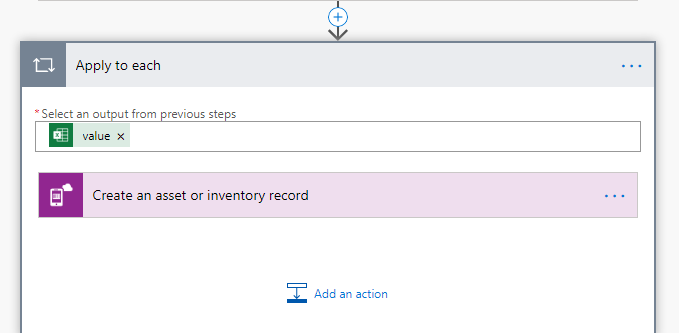
After that, continue to populate the necessary or required fields with more dynamic content. For example:
Once that’s done, save the entire flow set up, then let it run.
If needed, you can of course add further steps in the workflow.