Search The Knowledge Base
GS1 Barcode & NFC
Barcodes or even NFC tags that follow GS1’s standards have encoded data that can uniquely distinguish types of products, logistics units, locations, assets, etc.
The standards allow for key identifiers (Application Identifiers) such as product, shipment, location, etc, and key attributes such as serial numbers, batch/lot numbers, dates, etc, to be encoded on barcodes and extracted by scanners.
With the app’s GS1 parsing feature, you can scan supported barcodes or NFC tags and have the app extract relevant details that you want to capture as part of an asset or inventory attribute.
GS1 Digital Link QR Codes
The app can extract the element strings from GS1 Digital Link QR codes and then use the extracted value to further obtain key attributes such as serial numbers, batch/lot numbers, dates, etc.
To extract the element strings from a GS1 Digital Link QR code, first ensure that the smartphone app has been set up to do so.
From the smartphone app’s Settings page, go to the Data Capture Form Fields section.
Under the GS1 Digital Links section, ensure that the Extract Entire Element String is selected.
Extracting a Single GS1 Application Identifier
On the web app, first set up a Data Capture custom field.
On the Data Capture spreadsheet, under the Answer Type choose GS1 Barcode NFC.

Once the custom fields have been saved, on the associated form you will notice a form field like the one shown below.

From the button options, you can then choose to either scan a barcode (using a webcam or the smartphone app) or an NFC tag.
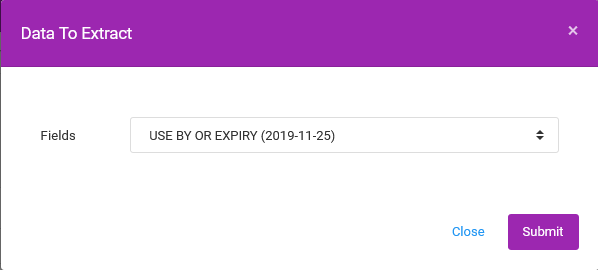
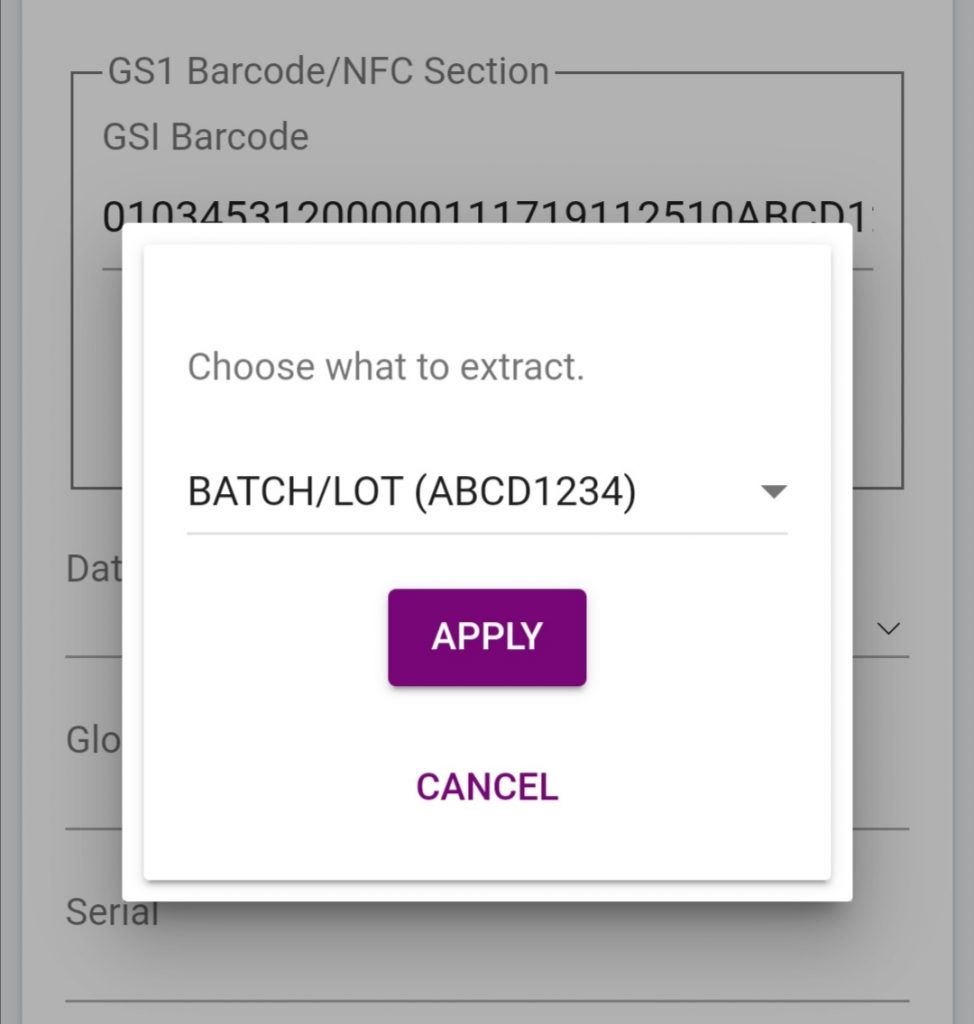
If the scanned barcode or NFC tag has valid GS1 application identifiers such as GTIN, expiry date, etc, you will be presented with a pop-up window like the one shown below.
From that pop-up window, you can then choose which data type should be extracted and saved on the form.
The same feature works in a similar manner on the smartphone app.
Extracting Multiple GS1 Application identifiers
The ability to extract multiple GS1 application identifiers, from a single scan, saves time by reducing the need to have the same barcode scanned over and over again.
You can have the app automatically populate other form fields with data extracted from a single scan.
To set this feature up, on the web app, first set up a Data Capture custom field.
On the Data Capture spreadsheet, under the Answer Type choose GS1 Barcode NFC.

Under the Options column, enter a URL to a CSV file that contains the application identifier code to extract and the name of the custom field to save the extracted data.
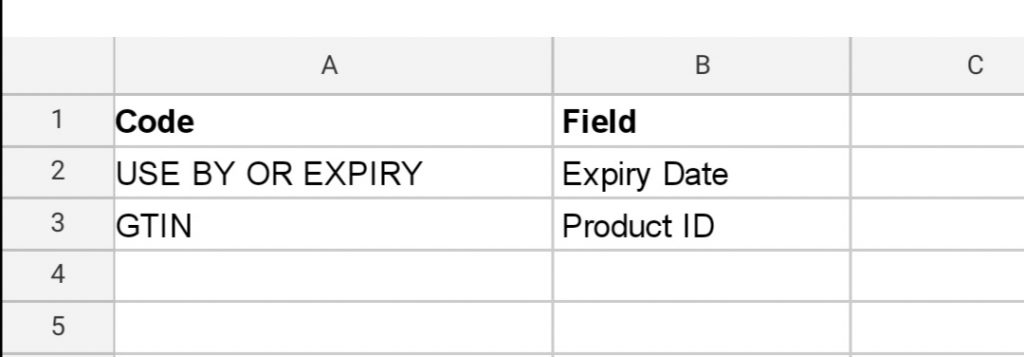
To set up the CSV, on your CSV program, you will need to set up two columns named Code and Field respectively.
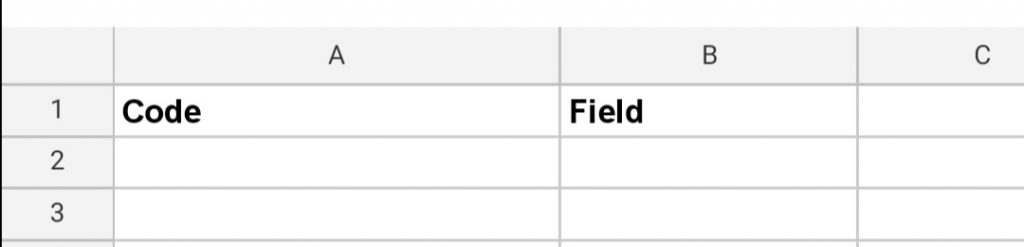
On the Code column, enter the appropriate code based on the data you wish to extract from a scanned barcode or NFC tag. Refer to the table on this page for the codes to use.
On the Field column, enter the name of the custom field that you want the extracted data to go to. Refer to the Data Capture Questions column for the names to use, as shown in the example below. The names can be anything you want.

The CSV to associate with the custom field settings should now look like this.
Save the CSV and upload it to the Documents page.
Scroll to the Uploaded Files table, then copy the URL for the uploaded CSV file.
On your Data Capture page, where you have the Answer Type set to GS1 Barcode NFC, enter the copied URL under the Options column.

Save the changes made.
On your form, when scanning barcodes or NFC tags, the corresponding fields that were set up in the CSV file will be populated automatically with the extracted application identifiers data.
