Search The Knowledge Base
Goods Dispatched
You can track outbound delivery of goods and set up notifications to be issued at different stages of the delivery process.
Prerequisites
There are two initial steps to set up the delivery tracking.
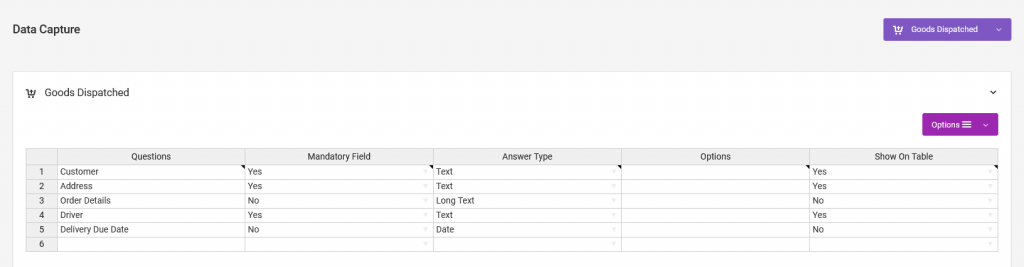
The first one is for customizing the Goods Dispatched Data Capture fields, for collecting the delivery details.
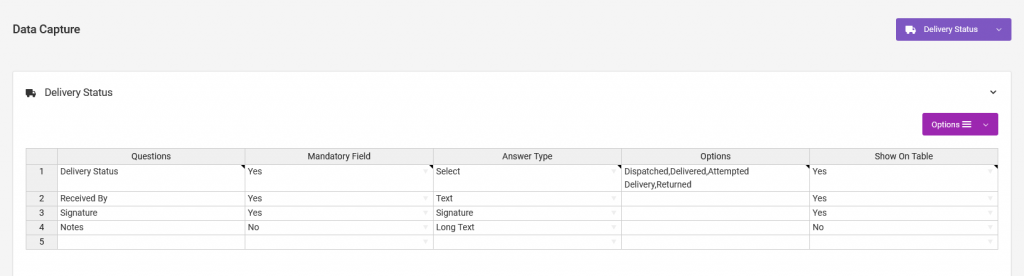
The second one is for customizing the Delivery Status Data Capture fields, for updating the delivery status.
Note – Some fields are required to preserve the functionality of the app.
Creating delivery records
Once both are set up, go to Deliveries > Goods Dispatched. On that page, you can add the delivery details individually by filling in a form or in multiples by importing a CSV file.
The table on that Goods Dispatched page will show the delivery records that have been set up.
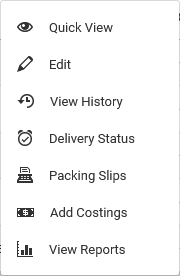
Under the Action menu of a record, there are options to print packing slips, update delivery status, view reports, etc.
Updating a delivery status
To update the status, go to the Delivery Status option, then on the new page, click on the Add New Records button > Add A Single Record. On the page that follows, fill out the form.
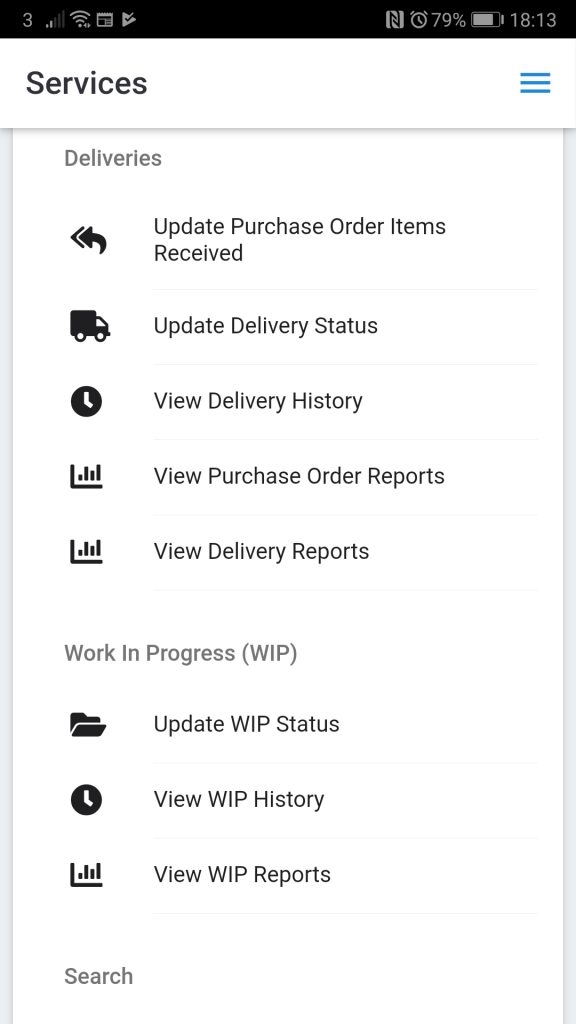
To update the status from the smartphone app, tap on Update Delivery Status. Thereafter, fill out the form.
If you print the packing slip, you can scan the QR code with the smartphone app. Alternatively, you can search for the delivery record, or scan any other barcode or NFC tag, that’s associated with the delivery’s Order Reference.
Setting up notifications
See this guideline on how to set up email notifications, which can include a tracking URL, that the recipient can use to track the progress of the delivery.
Creating and updating delivery records via automated workflows
Using Zapier
Using Zapier, you can automate how delivery records are added to your account. For example, you could edit a Google Sheet row and have the data on that row automatically used to create a delivery record or update a delivery status.
You first need to set up a Zap trigger.
After that, choose the app Ventipix Asset & Inventory Manager, and the action Create Delivery or Create Delivery Status.
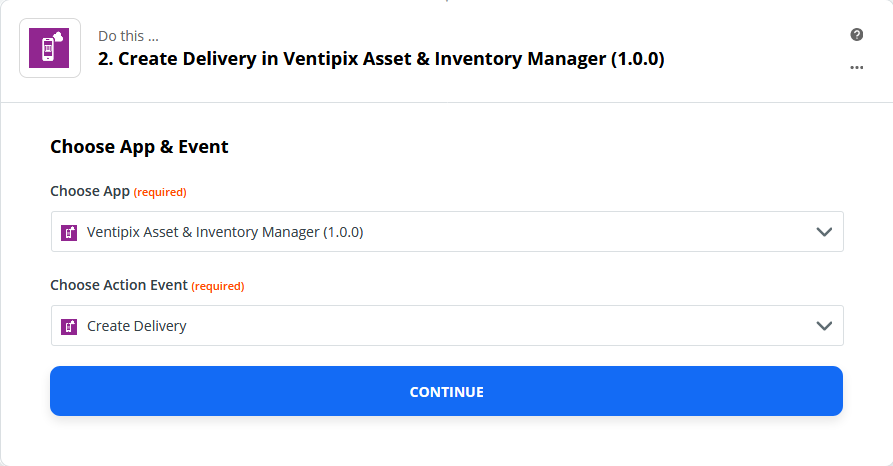
Click on Continue, then authenticate your account.
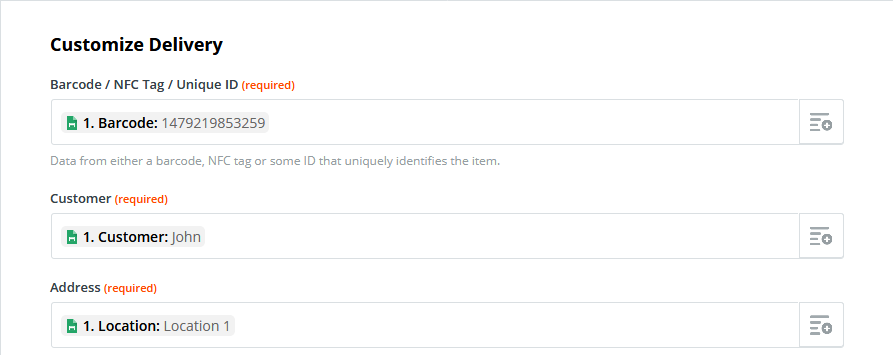
In the step that follows, map data from your Zap trigger onto the fields that you want to populate automatically.
Proceed to then test the integration, and turn the Zap on.
Using Microsoft Power Automate
Using Microsoft Power Automate, you can also automate how assets are added to your account from other platforms (flows). For example, you could set up a trigger or schedule whereby data from the source platform is automatically used to create an asset in your account.
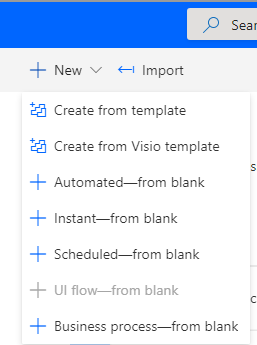
In your Power Automate account, set up a new flow, for example, “Automated – from blank” or “Scheduled – from blank“.
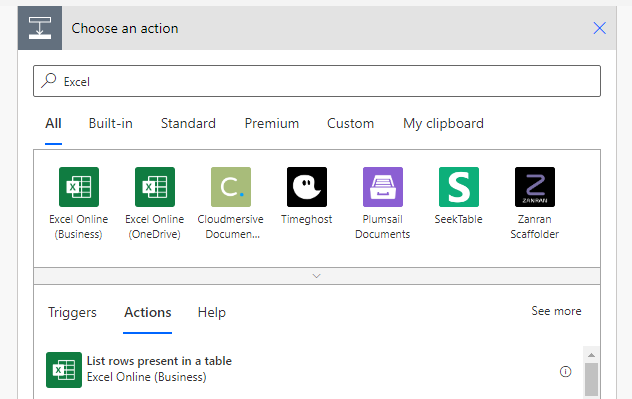
After that, choose the connector with the data source, and its appropriate action. If using Excel, you would choose, “list rows present in a table“. For example:
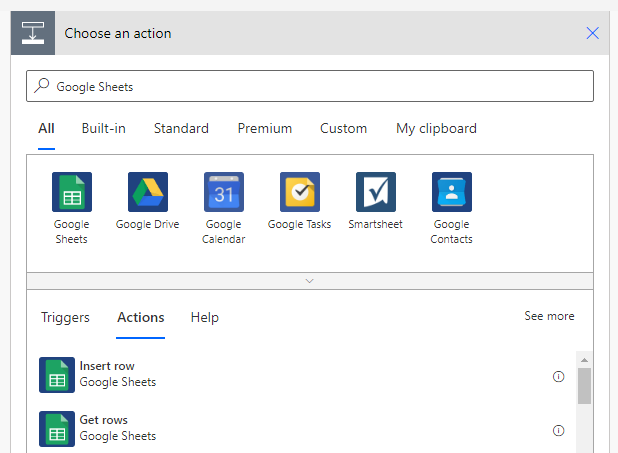
If using Google Sheets, you would choose, “Get rows“. For example:
Once the connector has been set up with all its authentication requirements, and file location details, proceed to add a new step.
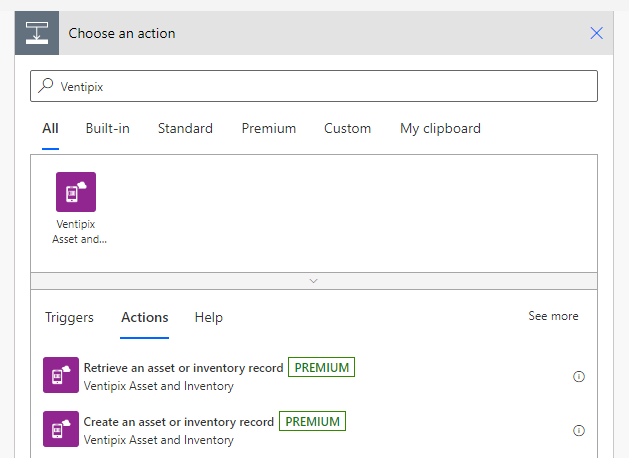
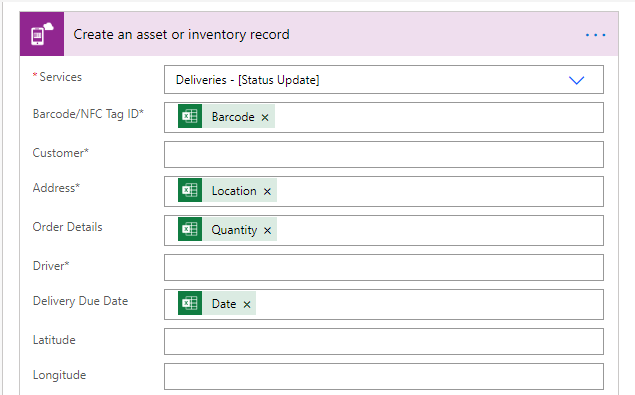
In this new step, search for “Ventipix Asset and Inventory” connector. Then, under its Action menu, select, “Create an asset or inventory record“.
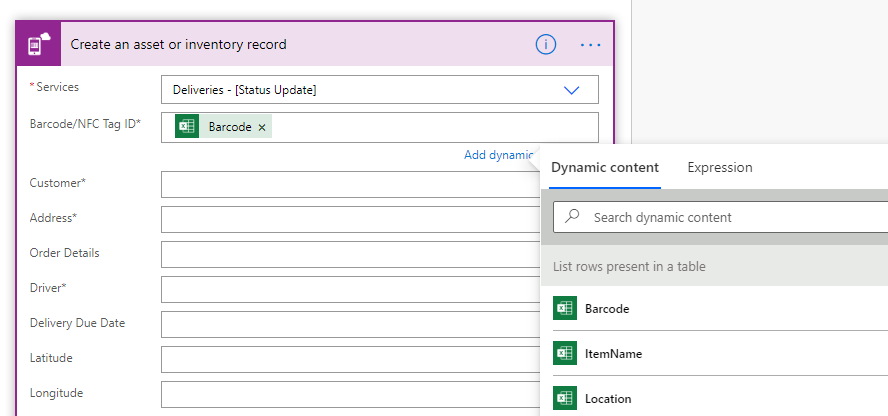
In the new prompt, under the Services dropdown, select “Delivery Status”.

In the input fields that will then be displayed, select the dynamic content that should go on to them.
On the “Apply to each” prompt, click on the “Create an asset or inventory record” title to expand it.
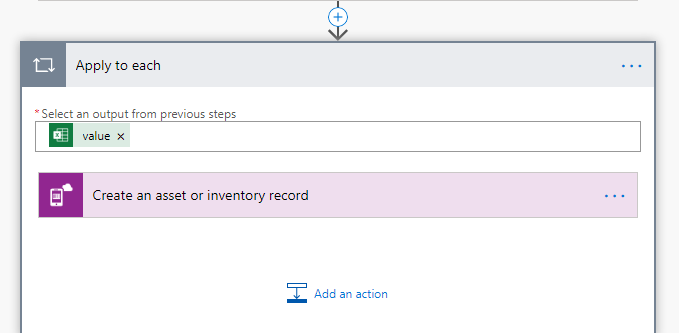
After that, continue to populate the necessary or required fields with more dynamic content. For example:
Once that’s done, save the entire flow setup, then let it run.
If needed, you can of course add further steps in the workflow.
Inventory Adjustments from Goods Dispatched
You can set up Goods Dispatched such that when a status update is made, specified inventories get their quantities updated too.
When creating a WIP record, under the Inventory section, choose the inventories, and the field to be adjusted, e.g. Quantity and the amount to adjust.

Under “When to adjust inventory?“, choose “When Delivery Status changes“.
After that, choose the delivery status that should trigger the adjustment.
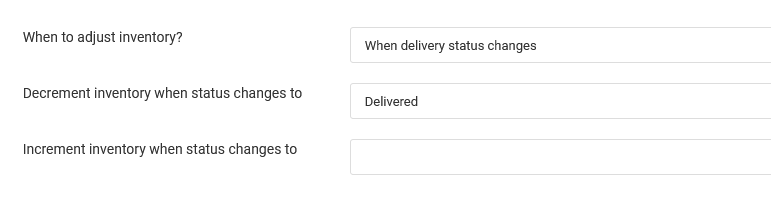
Once you have saved the changes, the next time a delivery status update is done, and the trigger condition is met, the specified inventories will have adjustments made.